Showing posts with label wood. Show all posts

Thursday, April 21, 2016

NOT a card

When I saw the challenge at As You Like It with the theme "Favourite Non Card Project" it was a toss up between one of my cakes or a painting.  In the end I thought I'd show one of my paintings. I painted this panther some time ago for my hubby's birthday, it's one of my favourite paintings because I made it for one of my favourite people, aaw, and he loved it, which made me proud.  
It was his birthday again last week and I only just managed to get a card made for him; how I ever found  the time to do a project like this I don't know... then again I was teaching decorative painting from home at the time, and card making hadn't taken root, lol.  I do hope you like it; ... it hangs in our al fresco area now, uplight by a lamp that really brings out those eyes
The whole thing is one piece of MDF, a platter I suppose you'd call it.  I used a pattern from Folk Art and Decorative Painting magazine and Jo Sonja Acrylic paints.... the "woodgrain" effect on the pseudo frame was done using cling film!!
There are a LOT of tiny strokes (using a tiny liner brush) involved to get the look of the fur, as with all things crafty (in my experience) it looks better in real life!


The eyes "follow you", very hard to capture in a photo... very effective irl.
I thought while I was at it I'd share my painting in Craft Your PassionThrough the Craftroom DoorLi'l Patch of Crafty Friends and Bizzy Becs Anything Goes challenges.  I think they're all okay with Non Paper projects, apologies if that's not the case.
I painted another picture about the same time as this one, of a clown, it's the one picture I painted that he has been keen on keeping on display (as well as this one, which was made for him and therefore a "given", lol)  I will show that another day soon.
I'll be back in a few days... with a card.  Until then, Happy Crafting, Donna

Monday, April 02, 2012

A Painting for a Change

Well I'm back from my holiday in Malaysia (well I actually had some dental work done there, so not so much a "holiday" more a sort of working holiday, lol)  Many stories to be told, and I'll share a few photos soon.  I haven't had a lot of time to craft since I got home, and as this fortnights challenge over at Here Come The Boys is "Anything But A Card" I thought I'd post one of my paintings.  I painted this to give to one of my son's friends when they had a baby... I ended up doing another (different) one as well,  so I've still got this in my back room - maybe another "boy baby" will come along and I'll be ready, lol.
This is "Little Ronnie" and I used a pattern by Wendy Scott from her book "the Cats Pajamas Vol 1", scaled up quite a bit!  I cut the frame out of a piece of MDF, using my scroll saw... and no, hubby didn't help!  I even cut a rebate in the back for the image panel (which was a piece of thinner MDF, nothing too hi-tech here, lol)  I painted it with Jo Sonja Acrylic paints and distressed it back to give an antiqued look.  
The image is painted with Jo Sonja Acrylics too, but only as washes - altogether I probably only used enough paint to cover a ten cent piece!  I'm really pleased with how it came out; I find faces very hard to paint and while Ronnie does have a slight "boxers nose" he does at least still look like a little boy :-) 
Crafty Creations, which is open to all crafts, has "Game On" as its challenge theme so I'm entering there, and Craft Us Crazy, also for all crafts, has Anything But a Card and/or Altered Item, so I'm entering there too. 
There's not much more to say about my little painting (actually, it's not THAT little, measuring 60+cm or more than 2' square!)  other than to say that it is "Anything But a Card", Creative Craft Challenges also has an Anything But a Card challenge, so I'm entering there.   
Please go and check out the rest of my Here Come The Boys team, there's a range of ideas to inspire you.  
I'll be back soon with a project, and maybe some Kuala Lumpur sights :-)  Until then, Happy Crafting, Donna

Tuesday, January 11, 2011

Hi Ho, Hi Ho, It's Back to Work We Go

As the title suggests, it's back to work for us today.  It has been a nice break, though having spent much of the time redecorating, that is probably not the right term!  We will file it under the "a change is as good as a holiday" category ;-)  As I haven't had a chance to finish any papercraft projects recently, I have a few baby/baby shower cards coming up very soon,  I thought I'd post some pics of items I have painted  as "baby" gifts -usually for my sons' friends.

This cute little group (called "Bear Hugs") was painted on a wooden box, I usually do boxes as they are practical as well as decorative.  I used a pattern by Debbie Cole, in her book " Heaven Sent Acrylics".  The paints, also as usual, are Jo Sonja.  


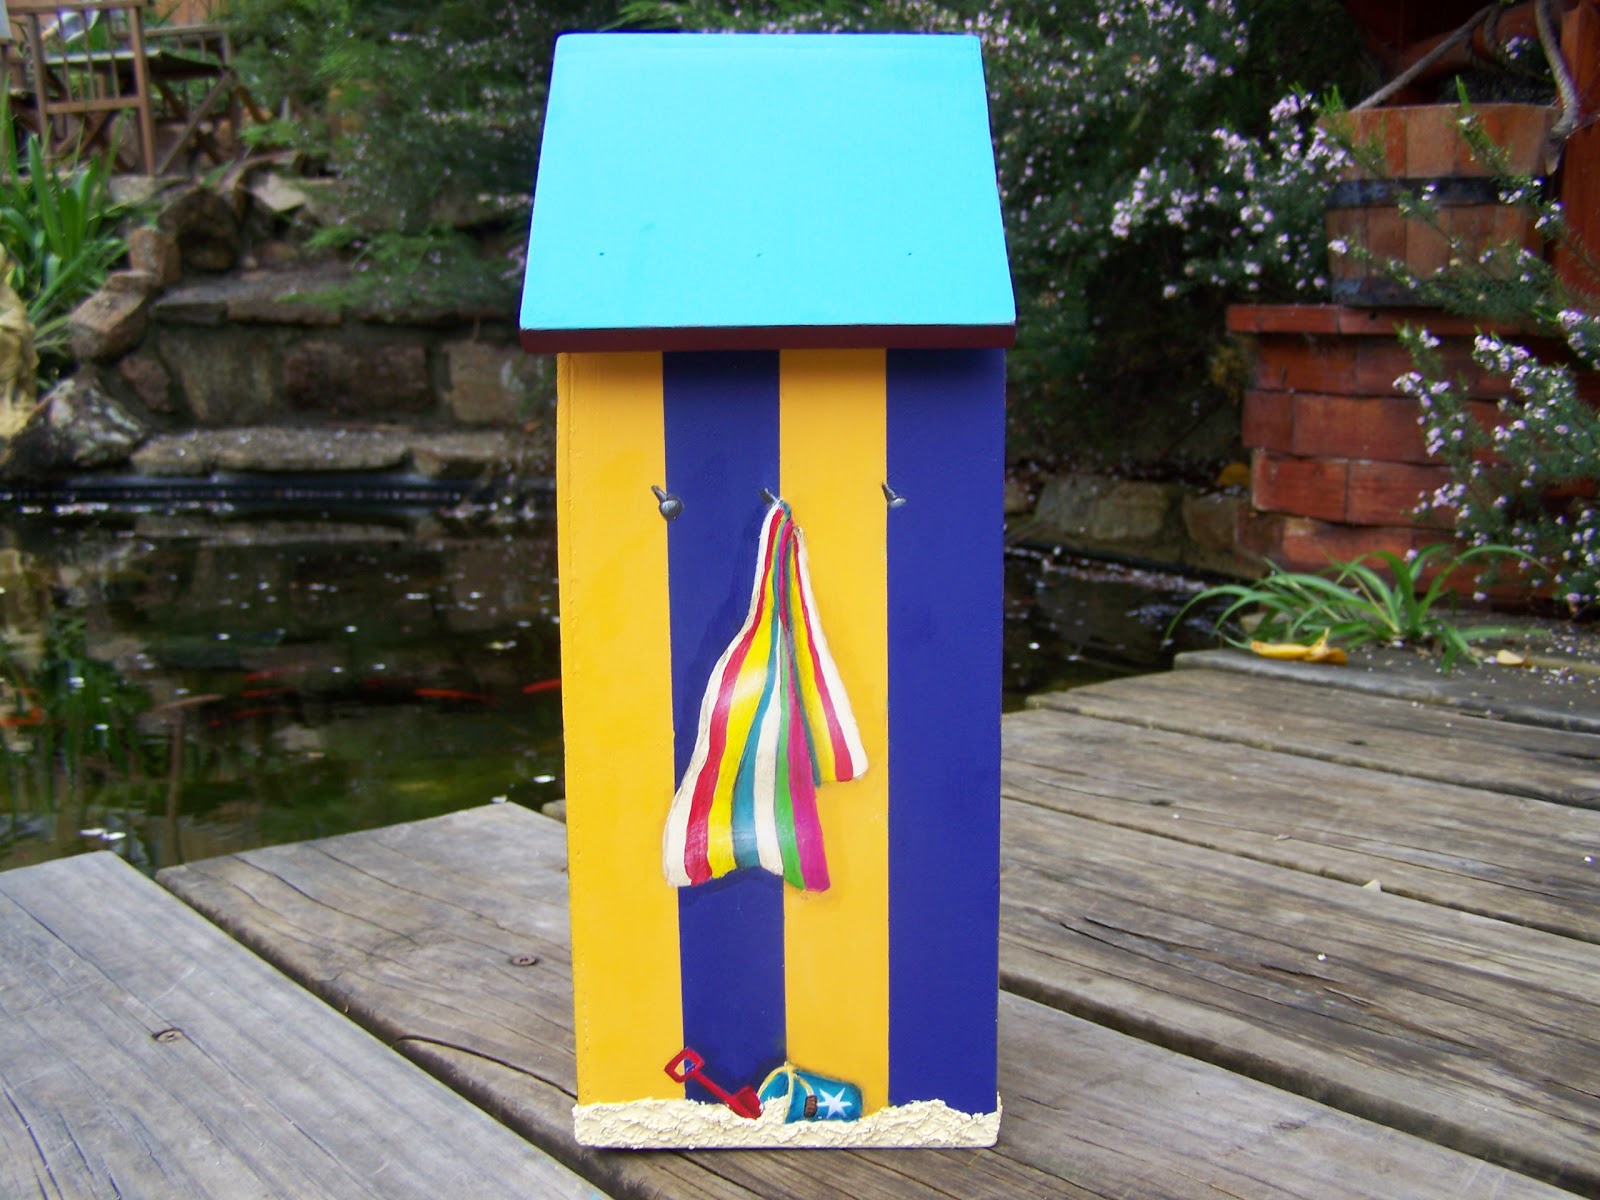
Heres a "quick pic" of the side of the box.


"Bear Hugs" was for my son's friends first daughter, I did another teddy box for their second - here it is:
The pattern for this little cutie is from the Ultra-talented Donna Gilbertson (fellow Australian), I found it in Australian Folk Art and Decorative Painting Vol 12 # 2.  Originally it was an Easter image, I just changed the contents of the basket from eggs to flowers.
I have painted quite a few things using Donna's wonderful patterns, they just "speak" to me, lol.  Check out her website here, I think you'll see what I mean!
I put pansies on the side to match her dress, originally they were much smaller, but I made a mistake on the fourth (of four, of course) "side".  Being a bentwood box, it just wouldn't wipe off, soooo -BIG pansies!!  They still looked alright, otherwise I wouldn't have given it to them :-)
"Little Ronnie" is offering #3.  The pattern for this darling little boy on his cute tricycle came from a book my sister gave me for Christmas a few years ago: "The Cat''s Pajamas"  by Wendy Scott.   I find with painting, as with papercraft, that boy-images are hard to find, so I was really happy to find this one.
I made the frame using my trusty jig saw and router.  It is made of MDF, but painted and distressed to look like aged wood (so much more affordable and available, lol)
The technique use just washes, so I used tiny amounts of paint.  As you have to build layers slowly, the hardest part of this painting is being patient - NOT my strong suit, but as I love the effect I do persevere and "wash" quite often! 
Last, but not least, for today is this box, which I made for another of my son and daughter in laws' friends.  Actually this lovely young couple are one of the ones that I am working on a current baby project for (their second child is due in about three weeks).  They are also the couple that I did this card for.

 "A Proper Victorian Bunny" came from quite an old book by Jean Myers called Cherry Jubilee.  I got it (in excellent condition) from a second hand book shop when I first started painting and wasn't sure if I would use books: I now have over 170 books - I KNOW, enough already!!!! But I do use them, and they don't eat anything :-)  They do however take up space, my studio is pretty full now with the paraphernalia of various craft pursuits.  Like I say in my blog header, I AM a serial crafter!!!
Anyway, enough waffle for one day I hear you say.  I promise I will have a (smaller) post very soon, I'm working on stuff for a few great challenges that are up and about again.  Thanks for visiting and until next time, Happy Crafting, Dee.


Sunday, October 10, 2010

The Wizard's in his castle and the Witch is in..... - or is she out?

The title of this post may be a bit confusing - unless you "look at the pictures".  Both these painting projects were done as gifts for my sister Fiona, who loves all things mystical and has a particular affinity with witches (so you see I'm not being rude implying she is a witch, I'm just appealing to her sense of fun), the fact that she loves cats and that there is a cat on the piece adds to its' appeal.  My sister also has been known to have hair of this hue, and some of Witchy's legwear looks familiar too, gotta love Fi!


"The Witch is In" project is a wooden piece she keeps by her door,  the plaque can be turned over to read "The Witch is Out", but I'm not sure she ever turns it over.  I used a pattern by DeLane Lange in her book "DeLane Paints Your Special Day" and Jo Sonja Acrylic paints. 
I cut the piece out myself, using the trusty scroll saw my husband bought me for Christmas last year, I have over the years received a few non-traditional Christmas gifts all of which have been entirely appropriate for me and invariably associated with craft: This year for my birthday, my eldest son bought me a heat gun -  as he doesn't know craft but does know tools it is a chunky industrial model that will outlast me, and as it was given and opened in a busy restaurant at my birthday dinner, to much excitement by ME, we got some very interesting looks "why is that woman so excited to get a drill" (that's what it looks like) and so on.  I don't know, there was the same fuss when I got my Dremel (specialist cutting tool), my framing tools, my bench grinder.......anyway, I digress.
 The second project is "Red Castle Wizard".  This plaque I also made and it was, as I recall, the first one I did using my router.  When I say "first" I should say this completed project is the end result of about fifty efforts with the router, the first 49 "ending in tears"  mine.  M-an, routers are hard to use!  It is from a pattern by Joy Vagg, which appeared in "Australian Folk Art & Decorative Painting, Vol 12 #10.  The technique used is known as pen and wash, whereby you start with a very light background (these become your highlights), draw in all the lines with a fine permanent marker, then wash the base coats of colour in.  The last step is to apply the shading, primarily with stronger applications of the base colours, strengthening them with darker shades.  Some pen and wash projects have the shading drawn in with the pen, this one didn't.  It is very much the idea behind colouring stamped images, particularly if you use copics or similar.
 Anyway, that's it for today. I hope that this isn't the only post I make with a Halloween theme before the end of the month, but if it is, at least I got these characters out there.  Hope you enjoyed, and don't forget I'll be "witching" you and have a "wizard" time crafting.......again, I hear you all groan, but I KNOW you love the corn really, Dee.

Monday, August 16, 2010

Brighton Beach Houses

I was "chatting" with someone the other day about a road trip my husband and I did a few years ago along the Great Ocean Road in Victoria.  It brought to mind some of the things we saw on that trip, one of them being the famous changing rooms on Brighton Beach in Melbourne.  These little "houses" are decorated in bright colours and make a fabulous scene, here's a photo:
Beach "Houses", Brighton Beach, Victoria. Australia


These beautiful little bits of cheer inspired me to create a wooden tissue box when I returned home.  I made a pattern from a box I bought in a discount store and my lovely Dad got cutting and gluing for me, then I drew up a pattern for the decorating, here's the finished result -


The sand along the bottom of the piece is sand from my garden - all I did was wash it and mix it with glue then plaster it on, it worked really well.  The hooks for the towel are just painted on, I think it would have looked good with little brads stuck on as hooks, but I wasn't card making at this stage, and hadn't even heard of brads, lol.  I couldn't quite get the shape of the thongs (flip flops if you're in England, jandles if you're in New Zealand!!) right, so I "buried" them in the sand :)  I have done a few tissue boxes in this sort of birdhouse style, but using other peoples patterns not my own, I always intended to paint more of these little beach houses in different patterns, I haven't got around to it yet, but maybe one day I will - when I haven't got anything else to do Ha Ha!!I