Wednesday, July 28, 2010

A Card "Suit"able for Father's Day

Just a lightning quick post today, it's the busy time of year: end of quarter, end of financial year and anniversary of starting our business - which means that all the annual renewals such as insurance are due and demanding attention. In fact, if I had one piece of advice re starting a business it would be "don't do it around tax time"! 


This card is in fact one of the, if not actually the, very first ones I made.  I got the template from "the net" but didn't realise I would become hooked on card making, so paid little attention to the author - if you recognise it, then I thank you and if you would like credit please contact me and I will credit you. I made it for my husband for Fathers Day last year (Fathers  Day is in September in Australia). I used black Cardex for the suit ( I actually had bought LOADS to make bonbonniere boxes for my sons' wedding, pictures of which I will post later, and had - still have in fact- a few sheets left.  It makes really good "suiting".  The shirt is from DCWV mat stack "Far East" and the tie is made from wrapping paper that I used to wrap the gift I gave him ( that is something I do quite often, eg I use some of the wrapping paper a gift came in to make a thank you card).  The suit buttons are tiny little ones that were in a bag of a zillIon from Spotlight.  I wrote inside the card with white gel pen "You are such a great Dad..........it obviously suits you".   What's more, I really mean it, my husband is a great Dad; was when the boys were little and still is now they are adults.

I made a matching envelope in plain turquoise with a strip of the shirt paper on it - it looked pretty good.  I can't believe that nearly a year has gone by and now I'm looking at making another Fathers Day card, well two actually as my Dad is still kicking!!!  I may have a photo of the card I made for him last year, I'll have to have a look on my hard disc, the technological equivalent of Darkest Africa, lol.
Anyway, hope you like what was,you have to remember, my first effort.


Monday, July 26, 2010

Another birthday, another cupcake

Another birthday card using the Cupcake Kiki digital stamp from CC Designs Kiki La Rue series, available from All That Scraps along with a ton of other great stamps and "stuff"!!
I used Jo Sonja paints to colour the image, as usual! The skin colour is Matisse Skin Tone, it is a better flesh colour than the Jo Sonja and I just about always use it. I raised the card (actually watercolour paper, I like the texture) with the image on using foam dots, it's just amazing the difference it makes having different "levels" on any card: Along with my corner rounder, foam dots (and I cut up and use all the leftover strips. so 'foam bits') are my must haves for card making.  
The cupcake paper is a digikit from Gina Jane Studios, I love the digikits because you can resize the images to be an appropriate scale for the card or project you're doing, plus they are so readily available!  The pink stripy paper is by Francheville, "Cranberry Stripes".  I embossed the sentiment and added some tiny buttons I bought in Spotlight.  The centre of the flower has a teeny rhinestone on it, and (after I took this photo) I added one to the cupcake.  Hope you like her, TFL

Friday, July 23, 2010

Queen of Hearts

Today's offering is  a set I did for a friends' 40th birthday: the card was inspired by a set of stickers I bought that said things such as "Don't mess with the Queen" and "Your Royal Highness will do", yet when I made the card the sentiments seemed inappropriate so "Celebrate 40" became what I stamped and embossed - consequently I have a packet of cheeky stickers that I will have to use and hope the recipients see the funny side (as I obviously did!)  

The image is from CC Designs Chubby Pencil collection "Queen of Hearts", from All That Scraps - I love just about all the stamps on offer there and am on a mission to collect them, or so it feels!  I painted Her Royal Highness with Jo Sonja acrylics, as I do most of my images, probably because I have so many of them, as in ALL!  I cut the panel out with Nestabilites Labels Four and my Cuttlebug.  The frame is made by simply using two "consecutive" dies which I taped to the card with removable sticky tape to stop them from moving about while cutting; I find Scotch Tape the best.  I used Lilac Avenue 6" paper pad by Kaisercraft for both the background of the card and the frame.   Some hydrangea blooms (from a really daggy looking bunch bought at the $2 for, unsurprisingly, $2 and a embossed greeting in purple mounted on an oval of Lilac Ave paper finish the card.  The gift purse, the template for which I cannot remember the origin of , is made with DCWV Latte Collection cardstock decorated with some "bling" and a gold cord handle.  These purses are great for gift vouchers: this one had a pamper package voucher rolled up like a scroll inside it, secured with the same gold cord - it looked pretty good.

Wednesday, July 21, 2010

Tickled Pink to be in a challenge


           This card was created using a sketch from Tickled Pink Stamps for their monthly challenge their address http://tickledpinkstampmonthlychallenges.blogspot.com/  Go check it out.  I used a CC Designs stamp from her Swiss Pixies range,"Ladybug Nora", painted with Jo Sonja paints on watercolour paper cut with a Nestabilities Label 4 die. The panels were matted with DCWV Endless Summer Mat stack and paper from Flavia . DCWV self adhesive Mat stack Brights punched with the Apron Lace border from Fiskars and DCWV Endless Summer stack for the "ribbon".  I inked the paper flowers with Kaisercraft Orchid pigment ink, the brad centres are little hearts; the leaves were bought as ribbon and I trimmed them off.  The "Heard you caught a bug" sentiment was printed on the computer on vellum, the insert of the card "...hope your're feeling better soon" was also vellum ( the sentiment inside nearly read "...hope it bug*#s off soon!" but I changed my mind!

Tuesday, July 20, 2010

Découpage or Paper Piecing


Here are a few cards using a technique referred to here in Australia (and in the UK at least, I think) as découpage. This technique is referred to as paper piecing in the US. This is a set I did for my Daughter-in-laws' birthday, I can't remember where I got the template for the gift purse, if I find out I will post it here. 
Anyway, as you can see the picture is built up in 3D by cutting and mounting  the areas that would be closer to you in "layers". In the first picture,the initial layer is the whole of the picture, the next layer just the lady, then the face and hat and the collar, then the brim and finally the bow (in two stages itself).  You can include as many layers as you like: all you need is enough copies of the picture. You can mount the pieces using silicone, which is a more traditional approach, or you can - like me and most others- use foam dots.  Découpage pieces look particularly nice in a frame.   The other card pictured was done using another image that came on the same découpage sheet, employing the same principles.  

Tuesday, July 13, 2010

Something a little bit manly


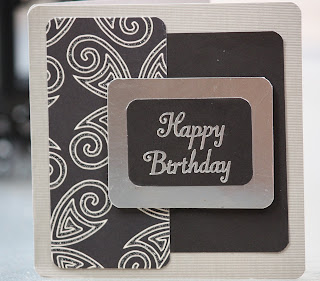
 Today's offering is a few masculine cards; the hardest to do, I think.  The first uses papers from the Die Cuts With a View Stack, All Glittered Up, some black sticker letters and square silver brads all put on a silver cardstock background.  The turquoise card is from DCWV too, the Jewel cardstock collection.


The black and silver card is very simple to do as well, the card is silver cardstock, the patterned paper is from the same DCWV stack as the last card.  The silver sentiment is a sticker mounted on black card and then on silver filler board, I use this filler board (it comes in silver and gold) quite a lot; it is available in drawing supplies and framing supply shops, usually with the mat board. It has the advantage of being not just metallic but "mirror" finish and you really don't need much of it - by the way it embosses with the Cuttlebug really well, making great frames

This card uses patterned paper from Kaisercrafts Rewind collection (this is from the 6x6 pad, I like the scale of these pads better for cards) the sentiment is stamped and embossed with navy ink, the border on the cream card is a tiny stamp that came with another set, (you know the ones you think you'll never use!) I just repeated it around the edge twisting it a little as I went. The stripy paper and the navy paper - which is metallic- are punched with a little punch my mother got me when she was in Penang Malaysia on holiday!  


The card below uses paper from DCWV Latte Mat stack (12") the image is a digital image from DigiStamp Boutique called BBQ Jim - there's a few "Jims" and they're all good for masculine cards.  The image is coloured with watercolour pencils, mounted on black card and attached with silver brads.  The sentiment is stamped and embossed with dark blue    Kaisercraft ink (the same ink has been applied lightly around the edge of the image) then attached with foam dots to add dimension

Sunday, July 11, 2010

Love is in the air

Thought I'd upload a few cards with Love as the theme, though ALL my cards are made with love - of course!
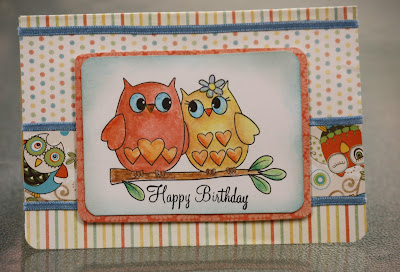
 This is in response to the Allsorts Challenge from digistampboutique, this "Love Owls" image is one of their digistamps. The colouring was done with watercolour pencils, the patterned paper is from Adorn -its Owls All Around and the background papers from Inque Boutique Cabana colletion.  The orange mat is from Die Cuts With a View "Endless Summer" mat stack (I think!) 
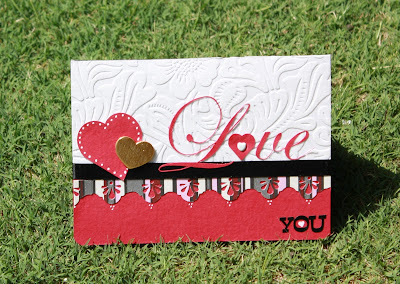
The second card is one I did for my husband for Valentines Day, The word Love isn't enough to describe how I feel about him - even in our 35th year together, aawww!!  I made it with black cardstock, the stripy paper is from DCWV All Dressed Up mat stack I punched a border with a corner punch to add interest. The white  is a beautiful flocked heavy paper; "Love" is cut from red cardstock with my Silhouette, as are the heart used in place of the letter "O" in Love and the other red heart .  The heart in the centre of the "O" in Love is a brad and the one in the centre of the "O" in YOU is just drawn in with white gel pen, as are the tiny dots on the peaks of the border.  The gold heart is foil covered thick card.  YOU are black stickers, black ribbon finishes the card.

Friday, July 09, 2010

Something other than cards


I've been doing some "housekeeping" in my Decorative Art folder and thought I'd share some photos of some of the art I've done over the years.  Firstly there are some photos of "Bug Boxes" I have done, the inspiration for these projects have come from Folk Art Magazines and other publications....believe me, if they are original ideas I'll claim 'em!!
                                                                                                                                                                                                  These papier maché boxes are painted from a pattern in "Fantasy Garden Vol II".  Using the lovely jewel colours from the painting, I made some matching jewellery , I think they make great looking gifts, but maybe I'm biased
Another Bug Box I painted was from another book by the same artist, "Faerie Garden Book 3".  It was a good gift for a boy, not toddlerish and yet not too grown up.  It was fun to paint too!

A cupcake kinda day


This is a card suitable for a young lady, in this case my 82yo Mother in Law! The digistamp is from CC Designs (All That Scraps), she is Kiki La Rue and this is one of a series well worth the look; this is Cupcake Kiki. I coloured her with Jo Sonja and Matisse paints (Matisse has a far better flesh colour than Jo Sonja). The cupcake paper is from a Gina Jane Studios digikit, how cute is it?! I used the D'vine Swirls Cuttlebug folder on pearl paper which I then inked with pink pigment ink and a blending tool. The pink laser paper (which is self adhesive) was in a pack from a $2 shop; it "Cuttlebugs" well - the texture really shows off the bling. As usual I managed to mark the background of the image, so the pink flower with pink rhinestone brad was a last minute cover-up addition. The strip of purple paper was a left over from another card, proving you really can use tiny scraps, it is from Kaisercrafts Lilac Avenue collection.


                                                                                                                                                                                                                                                          Close up shots show the cupcake paper and how the laser paper throws the light